애드몹(admob) app-ads.txt 를 적용하기 위해서는 블로그(blog)가 필요하다.

운영중이던 티스토리(tistory)에 적용 하려고 구글링 하였으나 결국엔 개인 도메인 / 호스팅 없이는 할 수 없다는 것을 확인 하였다.

돈을 들여가면서 도메인 / 호스팅 없이 구글 블로거인 블로거(blogger) + 블로그스팟(blogspot)로 가능하다.

이 방법을 적용 하기전 블로거(blogger) 가입 부터 한다.

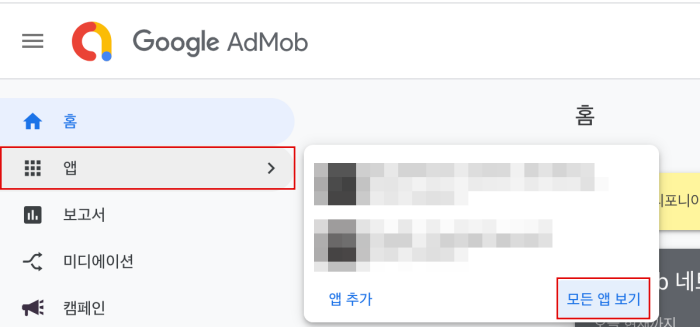
1. google admob 접속해서 모든 앱 보기를 누른다.

2. app-ads.txt 설정 방법을 누른 후 코드를 복사 한다.

3. 블로거(blogger) 관리자에 들어가서 ads.txt를 설정 부분에서 복사한 코드를 붙여넣기 한다.

4. 오류 및 리디렉션 설정을 한다.

소스 : /app-ads.txt

대상 : /ads.txt

5. 구글플레이 스토어 앱 등록정보에서 웹사이트를 블로거(blogger) URL로 변경 후 업데이트 제출을 한다.

6. app-ads.txt 적용 확인을 한다.

* 참고사항

실제 적용은 실시간 적용이 아니라 24시간 안에 적용이 된다.

tomcat에서 catalina.out 파일의 용량이 커지면 아래 명령어로 초기화 시킨다.

cp /dev/null catalina.out


헤더 정렬 >>>>>> style: 'text-align:center'

컬럼 정렬 >>>>>> align:'center'


Date endDate = new Date();
Calendar cal = Calendar.getInstance();
cal.add(Calendar.DATE, -10);
Date startDate = new Date(cal.getTimeInMillis());

LocalDateTime start = LocalDateTime.ofInstant(startDate.toInstant(), ZoneId.systemDefault());
LocalDateTime end = LocalDateTime.ofInstant(endDate.toInstant(), ZoneId.systemDefault());

long days = ChronoUnit.DAYS.between(start, end);​


아파치 + 톰캣 mod_proxy 연동시 503 에러 처리 방법

Apache + Tomcat mod_proxy 503 error


환경

OS - Cenos 7

Apache - 2.4


에러 내용


조치 방법(영구적으로)

vi /etc/selinux/config


# This file controls the state of SELinux on the system.
# SELINUX= can take one of these three values:
# enforcing - SELinux security policy is enforced.
# permissive - SELinux prints warnings instead of enforcing.
# disabled - No SELinux policy is loaded.
SELINUX=disabled
# SELINUXTYPE= can take one of three two values:
# targeted - Targeted processes are protected,
# minimum - Modification of targeted policy. Only selected processes are protected.
# mls - Multi Level Security protection.


조치 방법(일시적으로 - 서버 재부팅되면 다시 설정해야 함)

/usr/sbin/setsebool httpd_can_network_connect 1

import declarations are not supported by current javascript version


intellij 에서 vue 사용할때 나는 메세지

javascript 버전을 변경을 한다.


Document Jsoup 문서 못불러올때 처리 방법


Jsoup 에서 문서 로드 기본 용량은 1MB.

제한 없이 불러올때는 maxBodySize(0) 을 추가한다.

0은 제한없는 값이고 원하는 용량 사이즈를 넣으면 된다.

Document document = Jsoup.connect("http://www.naver.com")
        .userAgent("Mozilla/5.0 (Windows NT 6.1) AppleWebKit/537.36 (KHTML, like Gecko) Chrome/41.0.2228.0 Safari/537.36")
        .timeout(10000)
        .maxBodySize(0)
        .get();

The default capacity for loading documents in Jsoup is 1MB.
Add maxBodySize (0) when loading without restriction.
0 is an unlimited value and you can add the desired capacity size.


구글 애드센스 애드몹(admob) 광고 안드로이드 연결 하기


[xml]

<com.google.android.gms.ads.AdView
android:id="@+id/adView"
android:layout_width="match_parent"
android:layout_height="wrap_content"
android:layout_centerHorizontal="true"
ads:adSize="SMART_BANNER"
ads:adUnitId="ca-app-pub-xxxxxxxxxxxxx/xxxxxxxxxxxxx">

</com.google.android.gms.ads.AdView>

[java]

MobileAds.initialize(this, "ca-app-pub-xxxxxxxxxxxxx~xxxxxxxxxxxx");
AdView mAdView = findViewById(R.id.adView);
AdRequest adRequest = new AdRequest.Builder()
.build();
mAdView.loadAd(adRequest);

[build.gradle]

implementation 'com.google.firebase:firebase-ads:15.0.0'
implementation 'com.google.firebase:firebase-core:15.0.0'


String android_id = Settings.Secure.getString(this.getContentResolver(), Settings.Secure.ANDROID_ID); 
String deviceId = md5(android_id).toUpperCase(); 
Log.i("device id=",deviceId);


바이두는 기본적으로 중국내 번호로만 가입이 가능하다.

하지만 밑에 링크로 해외 휴대폰으로 가입이 가능하다.


https://passport.baidu.com/v2/?reg&sources=trendtalk+startchina&overseas=1


농협 2018년 아... 탐사수, 2L, 1... 앱솔루트 유기농 궁... 팸퍼스 베이비 드라...


+ Recent posts